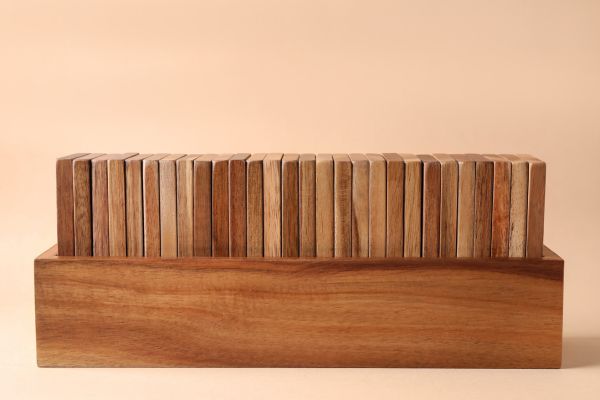
Dominoes is a timeless game that has entertained people of all ages for centuries. The satisfying clack of wooden tiles as they tumble and form intricate patterns on the table is a source of joy for many. While there are countless domino sets available in the market, there’s something special about crafting your own wooden domino set. In this article, we will guide you through the process of creating a unique and personalized wooden domino set, allowing you to unleash your creativity while enjoying this classic game.
The Beauty of Wooden Dominoes
Wooden dominoes hold a distinct charm that sets them apart from their plastic or metal counterparts. The natural grain, warmth, and tactile feel of wood add an aesthetic quality to the game that is hard to replicate with other materials. Crafting your own wooden domino set allows you to select the type of wood, customize the design, and create a set that reflects your personal style. Whether you prefer the rustic look of oak or the elegance of walnut, wooden dominoes can be as unique as the person making them.
Creating wooden dominoes from scratch not only offers a creative outlet but also a sense of accomplishment. The process involves careful measurement, precise cutting, and attention to detail, making it a satisfying project for woodworkers of all levels. Plus, the end result is a beautiful and functional game set that you can proudly display and use for years to come.
Materials You’ll Need
Before diving into the creative process of making your wooden domino set, it’s essential to gather all the necessary materials. Fortunately, you don’t need an extensive workshop to complete this project. Here’s a list of the basic materials you’ll need:
Wood: Choose a type of wood that suits your preference and budget. Popular choices include oak, maple, cherry, or walnut. Ensure that the wood is dry and free from knots or imperfections.
Saw: A saw will be your primary tool for cutting the wood into domino-sized pieces. A table saw or a miter saw is ideal for achieving precise cuts.
Sandpaper: You’ll need sandpaper with different grits (coarse to fine) for smoothing the edges and surfaces of the dominoes.
Ruler and Pencil: These tools are essential for measuring and marking the wood accurately.
Wood Glue: High-quality wood glue will ensure that your dominoes stay intact during play.
Clamps: Clamps are useful for holding the wood pieces together while the glue dries.
Finish: You can apply a finish, such as varnish or mineral oil, to protect and enhance the appearance of your wooden dominoes.
Designing Your Dominoes
One of the most enjoyable aspects of making your own wooden domino set is designing the tiles. You can let your imagination run wild, creating a unique set that reflects your personality or matches your interior decor. Consider the following design elements:
Size: Standard dominoes are approximately 2 inches long and 1 inch wide, with a thickness of about 0.4 inches. However, you can customize the size to your liking.
Dots or Pips: Decide on the number and arrangement of dots or pips on each domino. Traditional sets feature dots from 0 to 6, but you can experiment with different patterns or symbols.
Engravings or Artwork: If you’re artistically inclined, consider adding engravings or artwork to your dominoes. This can be a great way to make your set truly unique.
Wood Stain: Enhance the natural beauty of the wood by applying a wood stain of your choice. This can give your dominoes a distinct look while protecting the wood.
Personalization: Add a personal touch by engraving your name or a special message on the back of each domino. It’s a great way to make the set uniquely yours.
Cutting and Shaping the Dominoes
Once you have your design in mind and the materials ready, it’s time to start cutting and shaping the dominoes. Here’s a step-by-step guide:
Measure and mark the wood: Use a ruler and pencil to measure and mark the dimensions of each domino on the wood. Ensure that the measurements are precise to create uniform tiles.
Cut the wood: Using a saw, carefully cut along the marked lines to create individual domino tiles. Take your time to ensure straight and clean cuts.
Sand the edges and surfaces: Use sandpaper to smooth the edges and surfaces of each domino. Start with a coarse grit to remove any rough spots, and then gradually move to finer grits for a polished finish.
Apply the design: Add the dots, engravings, or artwork to each domino according to your design. Take care to make them symmetrical and evenly spaced.
Finish the dominoes: Apply the chosen finish to protect the wood and enhance its appearance. Follow the manufacturer’s instructions for the specific finish you’re using.
Assembling Your Domino Set
With all the individual dominoes ready, it’s time to assemble your complete set. This step involves gluing the dots or pips onto the dominoes and ensuring they’re aligned correctly.
Arrange the dominoes: Lay out all the dominoes in the order you want them to be in the set. Double-check that the dots are correctly positioned on each tile.
Apply wood glue: Apply a small amount of wood glue to the back of each dot or pip, then press it firmly onto the domino. Repeat this process for all the tiles.
Use clamps: Use clamps to hold the dominoes together while the glue dries. Ensure that the clamps don’t damage the surface of the dominoes.
Allow the glue to dry: Follow the recommended drying time for the wood glue to ensure a strong bond between the dots and the dominoes.
Testing Your Wooden Domino Set
Before you can enjoy your custom-made wooden domino set, it’s essential to test its functionality. Here are some steps to ensure your dominoes are ready for play:
Check for proper alignment: Examine the dots or pips on each domino to ensure they are aligned correctly and uniformly. This will prevent any gameplay issues.
Test for balance: Place each domino on a flat surface and check if it sits evenly without wobbling. Balance is crucial to prevent dominoes from falling prematurely.
Assess the finish: Inspect the finish on the dominoes to ensure it provides protection and enhances the wood’s appearance. Make any necessary touch-ups or refinishing if needed.
Playing with Your Homemade Domino Set
Now that your wooden domino set is complete and tested, it’s time to enjoy countless hours of gameplay with family and friends. Gather around a table, set up your dominoes, and let the games begin. Playing with a set you’ve crafted yourself adds a special level of satisfaction to the experience.
Learn the rules: If you’re new to dominoes or need a refresher, take some time to learn the rules of the game. There are various domino game variations, so choose one that suits your preferences.
Strategy and tactics: As you become more familiar with the game, you’ll develop strategies and tactics to outsmart your opponents. Dominoes can be a game of skill and strategy, so hone your skills with practice.
Create memories: Playing with your homemade domino set can lead to memorable moments and bonding with loved ones. Whether it’s a casual game night or a competitive tournament, the enjoyment is endless.
Caring for Your Wooden Domino Set
To ensure your wooden domino set remains in excellent condition for years to come, proper care and maintenance are essential. Here are some tips to keep your set looking and functioning its best:
Store them properly: When not in use, store your dominoes in a cool, dry place to prevent warping or damage.
Keep them clean: Wipe your dominoes with a soft, damp cloth to remove dust and debris. Avoid using harsh chemicals or abrasive materials.
Repair any damage: If a domino becomes chipped or damaged during play, repair it promptly to prevent further issues.
Reapply finish: Over time, the finish on your dominoes may wear off. When necessary, reapply a fresh coat of finish to protect the wood.
Sharing Your Craftsmanship
As you become more skilled at creating wooden domino sets, consider sharing your craftsmanship with others. You can give your custom sets as unique and thoughtful gifts for special occasions, such as birthdays or holidays. Alternatively, you might even start selling your handmade sets to fellow domino enthusiasts, turning your hobby into a small business venture.
Conclusion
In conclusion, making your own wooden domino set is a rewarding and enjoyable craft that combines creativity with practicality. The process allows you to create a unique and personalized game set that not only looks beautiful but also provides countless hours of entertainment. With the right materials, tools, and a little patience, you can craft a set of wooden dominoes that will be treasured for generations. So, roll up your sleeves, unleash your creativity, and embark on the journey of creating your very own wooden domino set today. Your friends and family will thank you for the countless memories and fun games that lie ahead.


